HA-SPK02 WiFi
Hearit.AI SpeakAI Mini Pro
Device Information
- Product Model: HA-SPK02-WiFi
- Device Guide: SPK02 WiFi User Guide
Firmware Update Methods
We regularly release new firmware to optimize performance and add new features. You can update your device using one of the following methods:
Method 1: Online Firmware Update
Before updating firmware, you need to connect your HA-SPK02 to a WiFi network.
WiFi Configuration
Step 1: Connect to Wi-Fi
This mode is suitable for the HA-SPK02 WiFi, which works independently without phone app - connect directly to your WiFi network.
1. Enter WiFi Configuration Mode:
a. Press and hold the lower button (play icon) to enter WiFi configuration mode
b. The device will create its own WiFi hotspot
2. Connect to Device Hotspot:
a. On your computer or mobile device, open WiFi settings
b. Look for a WiFi network named "HA-SPK02XXXXXX" (XXXXXX varies by device)
c. Connect to this WiFi network
3. Configure WiFi Settings:
a. Once connected, open your web browser
b. Navigate to 192.168.1.1 or scan the QR code below:

c. You will see the WiFi configuration page:

4. Enter Your WiFi Credentials:
a. Click the "config" button to access the configuration page:
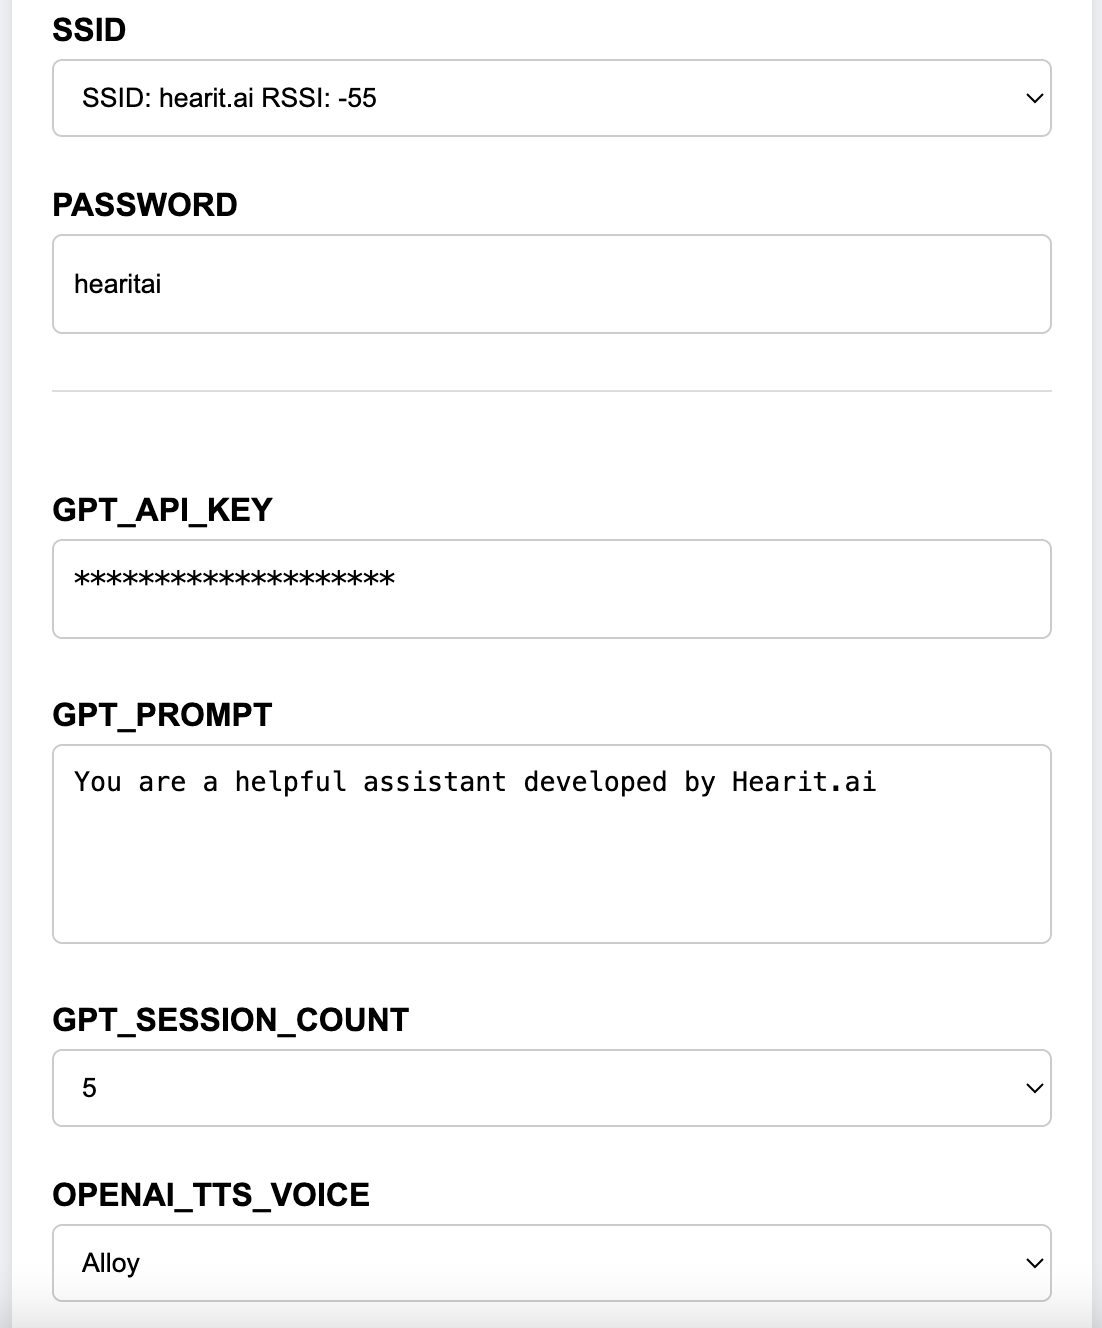
b. Select your home or office WiFi SSID from the dropdown list
c. Enter your WiFi password
d. (Optional) Configure AI settings:
- API-KEY: Use the default testing key or enter your own OpenAI API key
- GPT_PROMPT: Customize the AI system prompt for specific behaviors
- GPT_SESSION_COUNT: Set how many conversation turns the AI remembers (context)
- OPENAI_TTS_VOICE: Choose AI voice:
alloy,echo,fable,nova,onyx,shimmer
e. Click "Save Config" to save your settings
5. ReConnect to WiFi:
a. The device will announce "Connecting" and attempt to connect to your WiFi
b. If successful, the LED will remain steady
c. If connection fails, check your SSID and password, then press and hold the lower button to try again
Firmware Upgrade Steps
Regular firmware updates ensure your HA-SPK02 device operates with the latest features and optimizations.
Prerequisites
- Your HA-SPK02 device must be connected to a 2.4GHz WiFi network
- Ensure your device has at least 50% battery charge
- Make sure the device is within good WiFi signal range
Update Procedure
Step 1: Check for Updates
- Access the web configuration interface (192.168.1.1)
- Look for "Check for Updates" option
- The system will automatically check for available updates
Step 2: Install Update
- If an update is available, click "Update Now"
- Follow the on-screen instructions
- Keep the device powered on during the update process
Step 3: Update Completion
- The device will automatically restart after the update
- LED will indicate when the update is complete
- Your device is now ready to use with the latest firmware
Method 2: Product Flashing (Windows)
This method is suitable for advanced users or when the online update is not available.
Preparations Before Starting
Required Items:
- A computer running the Windows operating system (supports Windows 7/8/10/11)
- Original USB data cable
- Device to be flashed
- Flashing program corresponding to the device (
.exefile)
Notes:
- Ensure the computer has sufficient battery power to avoid power failure during operation
- Use the original USB data cable to ensure connection stability
- Disable antivirus software and firewalls on the computer before flashing to prevent interference with program operation
- Do not disconnect the USB connection or close the flashing program during the flashing process
Flashing Steps
Step 1: Prepare the Device
- Ensure your device is charged (at least 50% battery)
- Power on the device if it's not already on
- Connect the device to your computer via USB cable
- The device should be recognized as a USB device
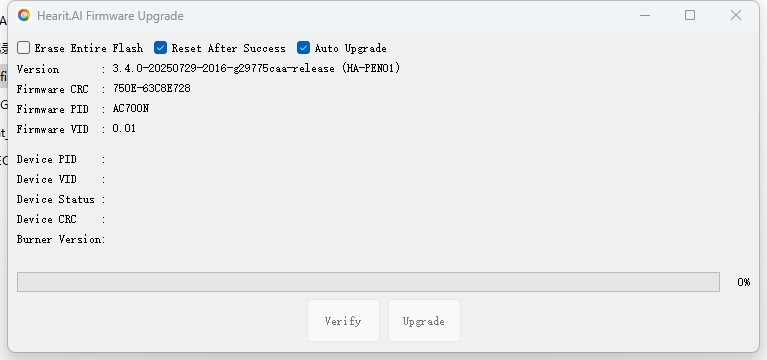
Step 2: Launch the Flashing Program
- Locate the flashing
.exefile corresponding to the device - Double-click the file to launch the flashing program
- Wait for the program to load completely (the main program interface usually appears)
Step 3: Device Detection
- Ensure the USB connection is secure between your computer and the device
- The flashing program should automatically detect the device
- Confirm the connection status displayed on the program interface
Step 4: Automatic Flashing Process
- The flashing program will automatically begin the firmware update
- The program interface will display the connection status and flashing progress
- Wait for the flashing to complete; do not perform any operations during this period
Step 5: Manually Trigger Flashing (If Automatic Flashing Does Not Start)
- If the program does not start flashing automatically, check the USB connection
- Find and click the "Update Mode" or "Start Flashing" button in the flashing program interface
- Observe the progress bar displayed on the program interface and wait for the flashing to complete
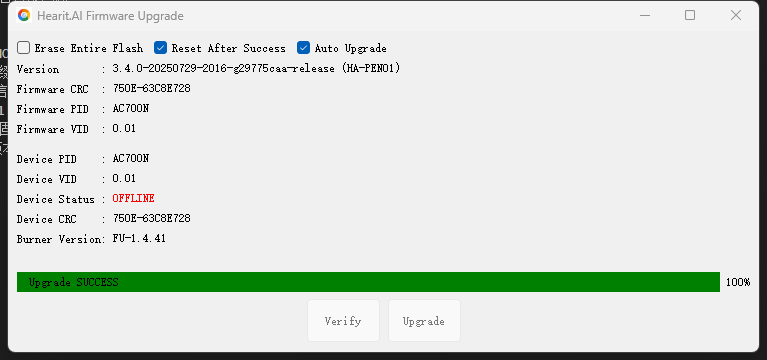
Completion and Verification
- After successful flashing, the program will display a prompt message such as "Flashing Completed" or "Success"
- The device will restart automatically or prompt that it can be disconnected
- Disconnect the USB connection and check if the device can start normally
- If the device starts normally, the flashing is successful
Technical Support
For assistance with firmware updates:
- 📧 Email: [email protected]
- 🌐 Website: https://www.hearit.ai